I had a DVD with 5 episodes of "The Avengers" (dubbed german). Each is about 49 minutes long and so my hard disc recorder couldn't fit them on one DVD. I removed the front credits and made them one title on the DVD. So there are 6 "films" on the DVD: 5 episode and 1 front credits.
In the end I want to have a (more or less nice) menu with buttons to start each episode.
Each episode should start with the front credits.
After each episode, the next one should start automatically.
In my first attempt I tried iDVD which, in fact, can generate really nice menus. Unfortunately iDVD just can pack 2hours on one DVD and needs to re-encode the source material.
After some experimenting I found a solution which works for me but might seem a bit longish. But after all I have these advantages:
- I have all the posibilities, iDVD offers in regards to menu creation
- I don't need to reencode the VOBs
- I can pack more material on a DVD than iDVD offers
- I have more flexibility for DVD navigation than iDVD alone offers
- I can add chapters
The process in short goes like this:
- I burn a DVD with my hard disc recorder to get the VOB files
- extract the DVD titles with Mac the Ripper
- extract the title sound and create a menu background
- create a dvd image with Sizzle, putting chapters in
- create a dvd image with iDVD using dummy files instead of the real ones
- merge both images
- manipulate the merged image with myDVDEdit
- create a new DVD image with DVD Imager
- burn the image with disc utility
Here is all the software I used in making my standard hard disc recorder's DVD a nice individual on:
- Mac the Ripper
to extract each individual film as a *.VOB file on it's own.
- VLC
to make a snapshot of the front credits to have a picture for the menu's background.
- Gimp for OS X
for image manipulation and especially for creating the background image.
- Sizzle
The program to create a DVD Image and Chapters. Unfortunately it seems to be no longer available and I just was a bit lucky to find the last version on mac.softpedia.com.
- ffmpegX
for extracting the title sound.
- iDVD (should be on your Mac in /Applications)
for creating a fancy menu.
- myDVDedit
to manipulate the DVD image iDVD created. I used this program to prepend the front credits to each episode and to make the autoplay of the next episode happen.
- DVD Imager
to create an image from the manipulated VIDEO_TS folder.
- disc utility (should be on your Mac in /Applications/Utilities)
for burning the image.
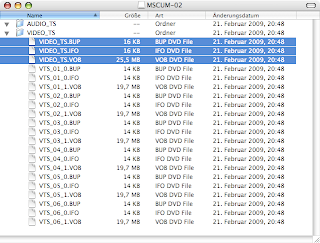
After creating my DVD on my harddisc recorder, I popped it into the Mac and started Mac the Ripper in "Title Only Extraction" and extracted each of the 6 titles.

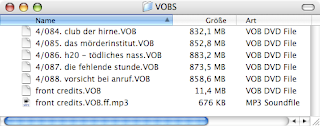
The result should look something like this:
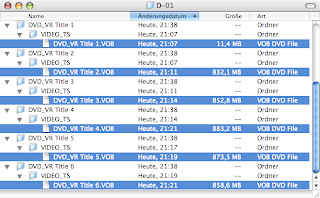
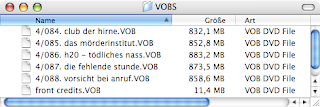
I moved the 6 VOB files to another folder and renamed them to match the names of the episodes.
When I had my videofiles, I started VLC with the front credits and took two pictures. I merged the pictures with Gimp to have a nice background image for the DVD Menu. I won't describe this step in detail.
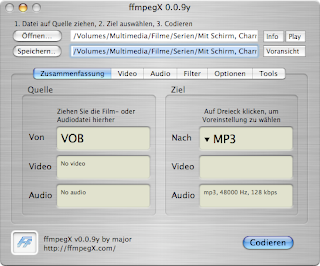
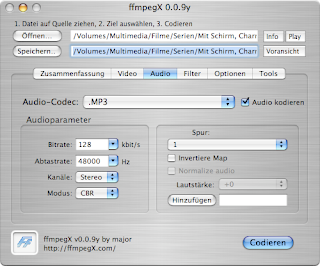
To have a background sound, I took the front credits VOB file and opened it with ffmpegX

Click the dropdown (triangle) at the shown "AVI DivX" and change it to MP3
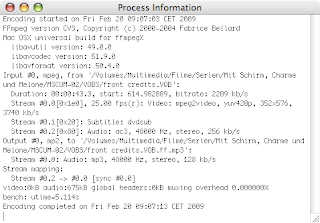
When you start the process, it might fail very quickly and you might get an eroor message like this
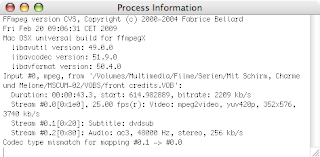
On ffmpegX' audio tab, you can change the stream (labeled "Spur" on the snapshot) to use for audio extraction. Usually it works if I set this to 1, but you might need to experiment a bit.
If it succeeds, you'll get an ouput like this:
And you'll have a new MP3 file in your VOB folder
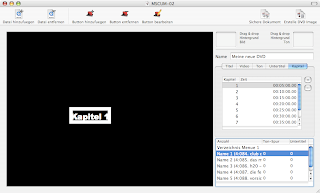
Then I started Sizzle and added all my video files. The sixth one being the front credits.
I added chapters at every 5 minutes of each episode. I just wanted to have these chapter marks to quickly jump forward and backward. This job is a bit tedious. The best way to accomplish this is, to simply add enough chaptermarks and set their values afterwards. Adding chaptermarks can only be done by clicking the mouse. Changing values can be done using keyboard alone. So I added 8 chapters to get a total of 9. Then clicked the first one to change it to 00:05:00.00 (5 minutes) and continuing my way down to #9 at 45 minutes. As each episode is about 49 minutes, I didn't needed a mark after that.
Note that I didn't add any button to start any of the episodes.
Then I started Sizzle's DVD Image creation.
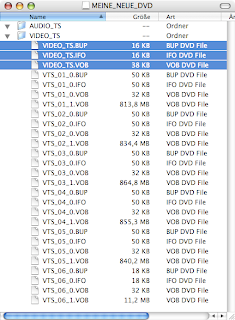
When the image was done, I activated it and copied all it's content to the harddrive and made it writeable. You can do this either using the Finder (Cmd i and changing permissions recursively) or the shell (chmod -R +w VIDEO_TS).
This is the contents of the Image. The first three files (the selected ones on the snapshot, VIDEO_TS.*) won't be needed afterwards, but it doesn't hurt to copy them too.
In the next step I used iDVD to create the menu. But before that I needed some video content to use in place of the real VOB files. A bit googling brought me to the Teotihuacan Home Page and it's
Video Download page. I choose the smallest video available and copied it 5 times to get one dummy file for each of my VOB files.
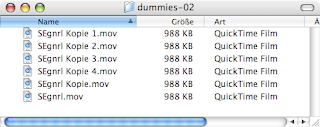
I then renamed them to match the VOB files' names
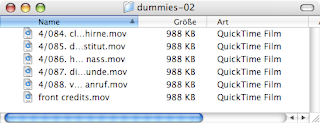
This also helps in iDVD as it will take the file name for the menu's buttons.
Next I started up iDVD and created a new project. From iDVD's old themes I choose the photo album as basis for my menu, as this theme doesn't have any opening sequence or moving content, which I didn't like.
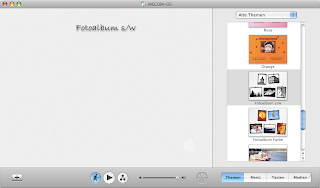
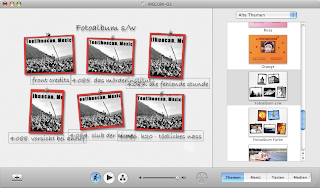
Then I added all of my 6 MOV (dummy) files at once by dropping them onto the canvas. The result looks a bit messy:
But after changing the buttons to text only
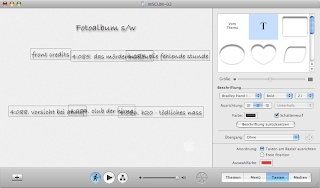
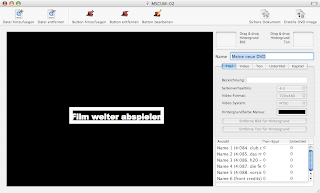
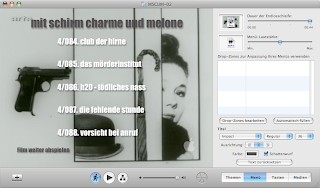
Rearranging a bit and changing colors and fonts, also adding the background image and sound, it all looks quite nice:
I also won't describe the whole process here. I guess there are good enough iDVD tutorials around which will help you should you really need guidance. I mostly learned everything by experimenting a bit.
Please note that the front credits is now the button labeled "Film weiter abspielen" (resume film). The front credits will never be started on it's own and I needed a resume button anyway, so this came in handy.
Don't worry: The real navigation will be done later.
After saving the iDVD project, I created a DVD image. This needs some time, but fortunately not too long as the dummy files are really short.
Again, after the image is done, I activated it.
This time only the first three files (VIDEO_TS.*) are needed and need to be copied to the VIDEO_TS folder I copied earlier from the Sizzle image. I had to make them writeable after copying. Again this can be done by either by using the Finder (Ctrl Cmd i) or the shell (chmod +w VIDEO_TS.*).
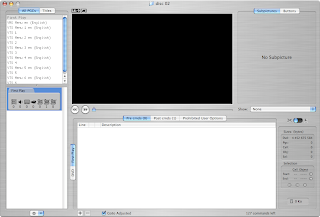
Now I started up myDVDEdit and opened the VIDEO_TS folder of the copy. Remember: It contains the menu from iDVD (VIDEO_TS.*) and the contents from Sizzle (VTS_*).
So please don't be astonished, if you get an error message:

When the errors are fixed, save (Cmd s)!
I won't explain myDVDEdit's interface here. That's well done in Jérôme's
tutorial section of myDVDEdit's forum. Note that I (try to) use the same names for the GUI parts, as are used in the english tutorial you find at the link above.
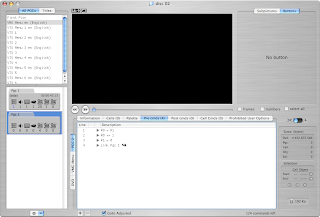
Click "VMG Menu en (English)" in the PGC Selector and you will see the menu created with iDVD.
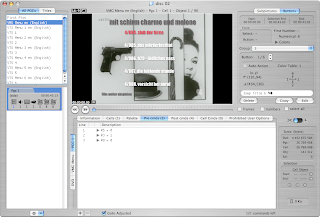
First I changed the buttons so that they will start the appropriate episodes. Because I added the VOB files in the correct sequence to Sizzle, Title 1 now is the first and title 5 the last episode while title 6 is the front credits.
iDVD on the other hand doesn't take care for the sequence the movies were added. So the first button can as well start title 1 as it could start title 6, which it did in my case, as you can see from the snapshot.
I will change that now, but the buttons won't start the titles directly! I just set a register (think of it as a variable in programming sense) and jump to one specific position in the sequence of commands.
But here is what to do:
- In the Buttons zone click "Edit"
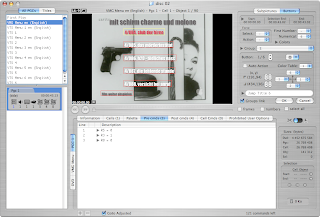
- Select Button 1 (usually already selected)
- Click on the triangle to the left of "Jump Title 6"

- In the Popup change the settings as shown:
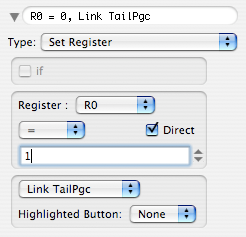
Type: Set Register
Register: R0
Operator: =
Direct: yes
Value: 1
Link: Link TailPgc
Highlighted Button: None
This process needs to be repeated for the other 4 buttons, setting R0 to 2, 3, 4 and 5 respectively. The 6th button ("Film weiter abspielen" / "resume film") is changed too, but this time not to "Set register" but to the single command "resume".
With a click on "OK" the changes are saved.
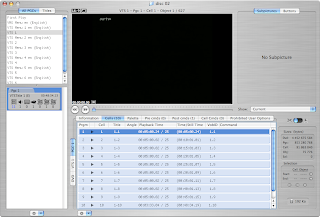
If you are still in "VMG Menu en", you'll see in the data zone see 4 commands in the "Pre cmds" tab:
R5 = 0
R3 = 1
R0 = 0
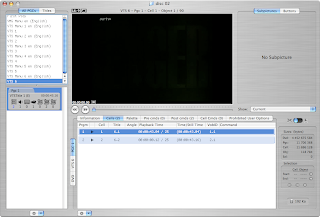
Let's get rid of them by selecting them and clicking the [-] Button at the bottom of the zone.
Now some new commands need to be entered.
if(R0 == 0) Goto 9
if(R1 != R0) Goto 18
R0 = 0
if(R1 == 1) Goto 13
if(R1 == 2) Goto 14
if(R1 == 3) Goto 15
if(R1 == 4) Goto 16
if(R1 == 5) Goto 17
R0 = R1
R0 *= $0400
highlightedButton = R0
R0 = 0, Link Prgm 1
Jump Title 1
Jump Title 2
Jump Title 3
Jump Title 4
Jump Title 5
R1 = R0
R0 = 0
Jump Title 6
On the "Post cmds" tab there are 4 commands which must be deleted and replaced by:
Jump VMG Menu Pgc 1
A short explanation: This "Post cmds" is the place where the buttons are linked to. So if a button is activated, Register R0 is set to the title to start. The execution then reaches the "Post cmds", which is simply a "Jump VMG Menu Pgc 1". When you click the arrow behind that command, myDVDEdit shows the section that will be reached. It's exactly the 20 commands just entered. If you follow the logic, you might see what will happen, but stay tuned. myDVDEdit can help here too with it's debug feature. But first the DVD needs some more commands.
As I said earlier, the register R0 gets the title number which should be played. After a title is played, the next one should start automatically. So I have to increment the title by one. Since this needs to happen 5 times, I simply created a new Pgc in "VMG Menu" and added some Pre cmds to it.
R0 = R1
R0 += 1
R1 = 0
Link Pgc 1
While a title plays, Register R0 must be set to 0 and R1 holds the current title number. The reason for this is, that the Viewer might press "Menu" or "Title" on his remote control at any time. Would R0 then be something other than 0, the current title would simply restart and the title menu could never be seen again. Check the logic of VMG Menu's Pgc 1 Pre cmds. So this is the reason for the first command "R0 = R1".
Switching to one of the VTS' Pgcs, the Post cmds look like this:
Call VMG Menu Pgc 2
So this is exactly what's needed! After each of the titles, Pgc 2 of the menu is called.
Just the Post cmds for VTS 6 need to be changed. After title 6, the real title has to start. Remember: Title 6 is the front credits. To accomplish this, the Post cmds need to be changed to:
R0 = R1
Call VMG Menu Pgc 1
In "VTS Menu 1 en", three Pgcs can be seen. Not all of them are needed, all but Pgc 1, which is labeled as "(root)" can be deleted. (Hint: I had a crash of myDVDEdit when deleting Pgc 2 first. I just tried it once and it might have happend by accident. I deleted Pgc 3 first after that crash.) After deleting Pgc 3 and Pgc 2, one Pre cmd in Pgc 1 remains:
Link Pgc 3
It' s labeld with an error "not found", so I delete it and replaced it with
Jump VMG Menu Pgc 1
Short explanation: The Pgc is labeled as "(root)". This means it's called as soon as the "Menu" button on a DVD Player's remote control is pressed. As I didn't want to have any menu for each title (episode), I simply instruct the DVD player to jump to the DVD's main menu instead.
I repeated this for the other 5 VTS Menus.
The only thing left to do is, to initialize R1 with a value that will highlight button 1 but not directly start title 1. This is done in the PGC called "First Play". Without further explanation, this is the Pre cmd:
R1 = $8001
One final step needs to be done to the DVD. I want a chapter mark at the end of each title. Currently there are chaptermarks every 5 Minutes. But while the DVD player plays the last chapter of a title, pressing "Next Chapter" on the remote won't have any effect, as there is no chapter following.
To enable this, I added to each VTS one empty cell. In the VTS (1 to 6), I opened the Cell tab in the data zone, right clicked on any Cell and selected "Add Cell > Blank".
I repeated this in each VTS. Even for VTS 6
Now the commands can be debugged (tested). Clicking on the small switch with the scissor and the bug

shows a "remote control"
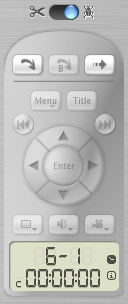
With it's help one can step through the commands and watch what happens.
That's it. After saving the changes, I started DVD Imager
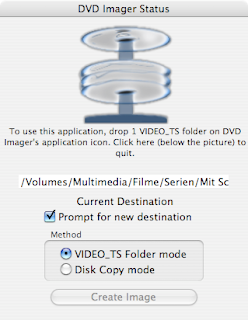
and dropped the VIDEO_TS folder on it. When the image is ready, it can be burned using OS X' standard disc utility.


